In order to create HashRepos transactions with the Ethereum blockchain, a digital wallet supporting Ethereum and Etherum based tokens is required. Please follow the instructions below to install the Metamask wallet on your desktop.
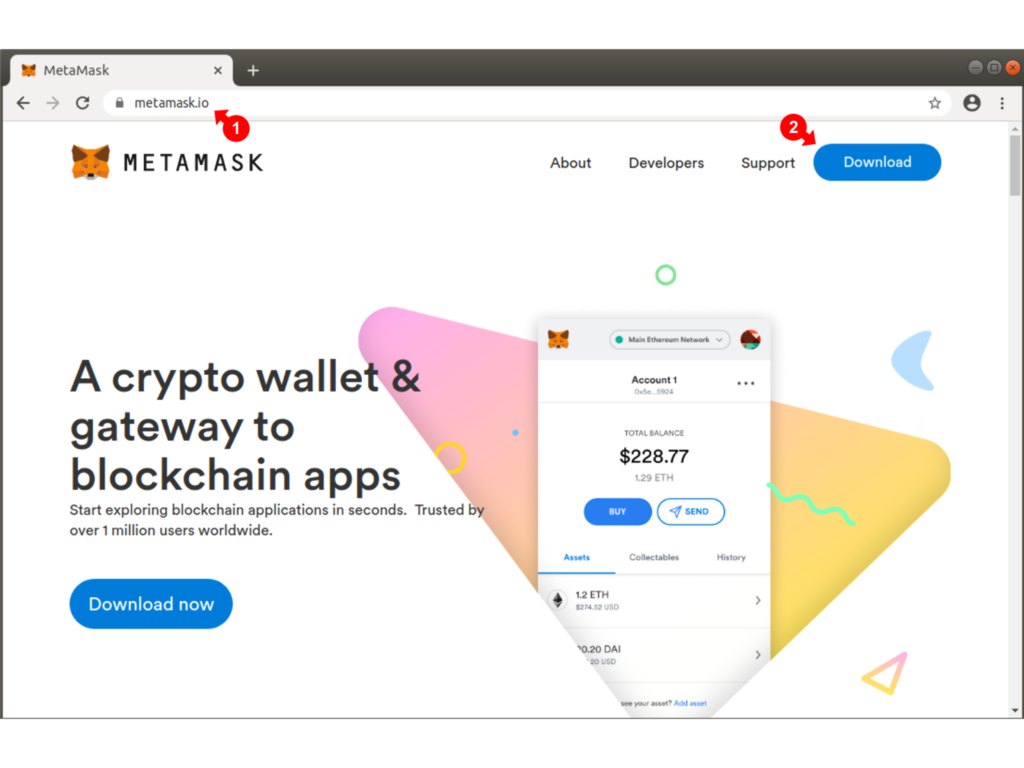
Go to the Metamask Site (1) https://metamask.io and click on download (2).
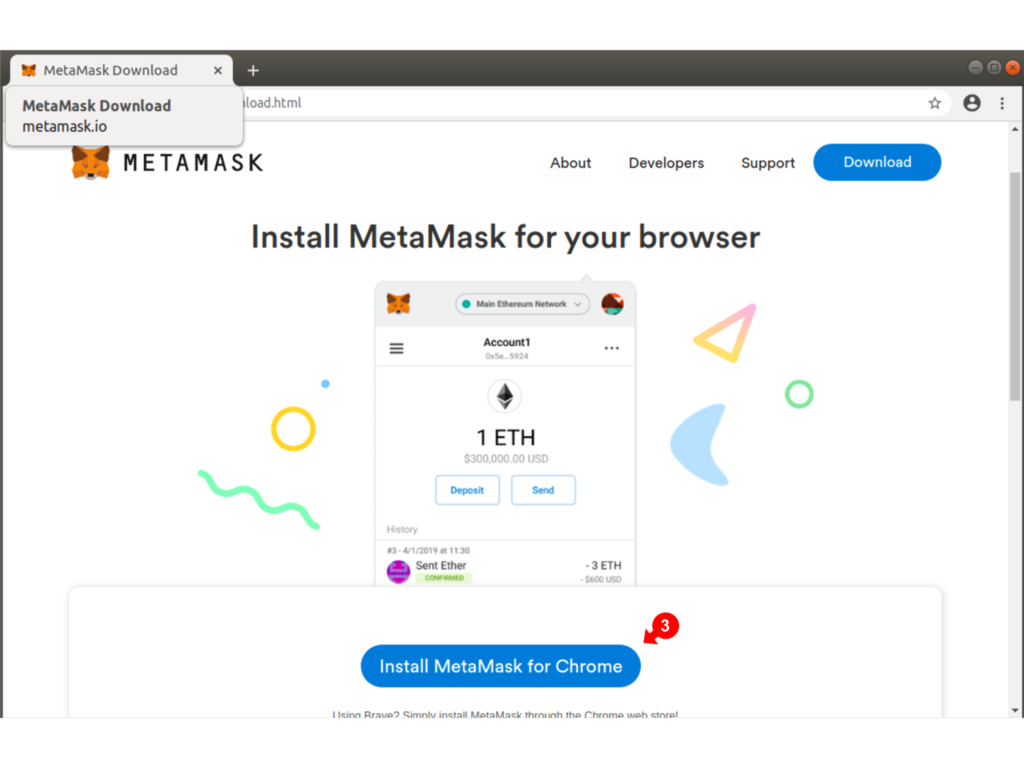
Install the Metamask extension (3) for the Chrome browser (recommended)
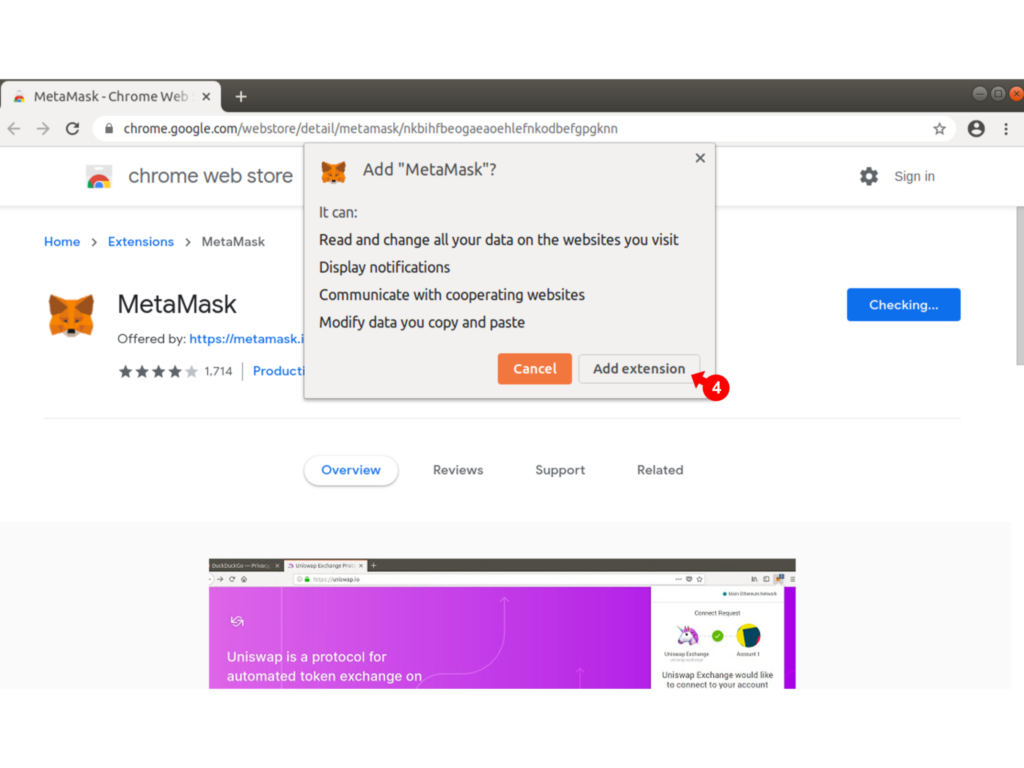
Click on Add Extension (4)
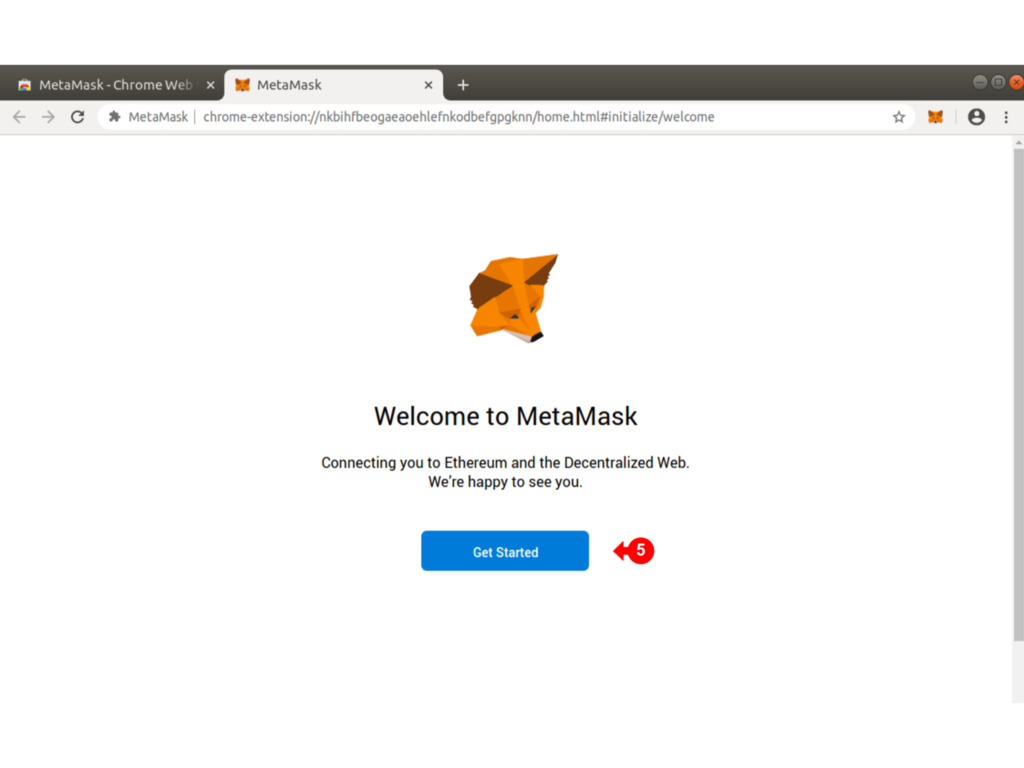
Once the Extension is installed, cick Get Started (5)
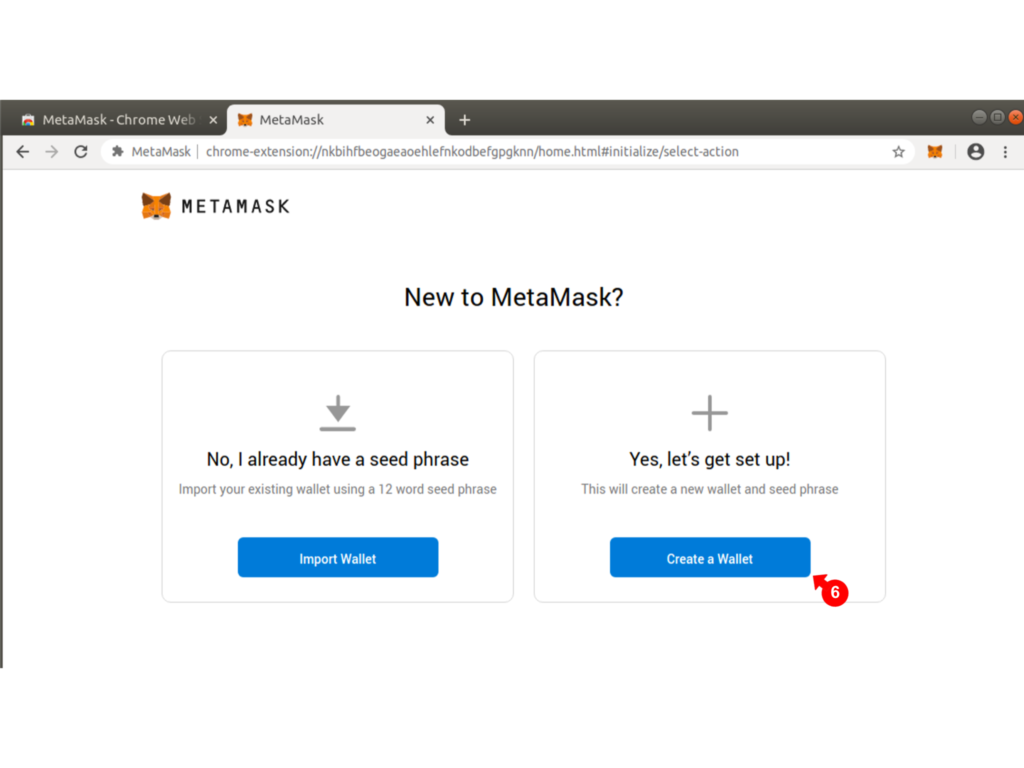
If you are new to Metamask and this is your first wallet, Click on Create A Wallet (6)
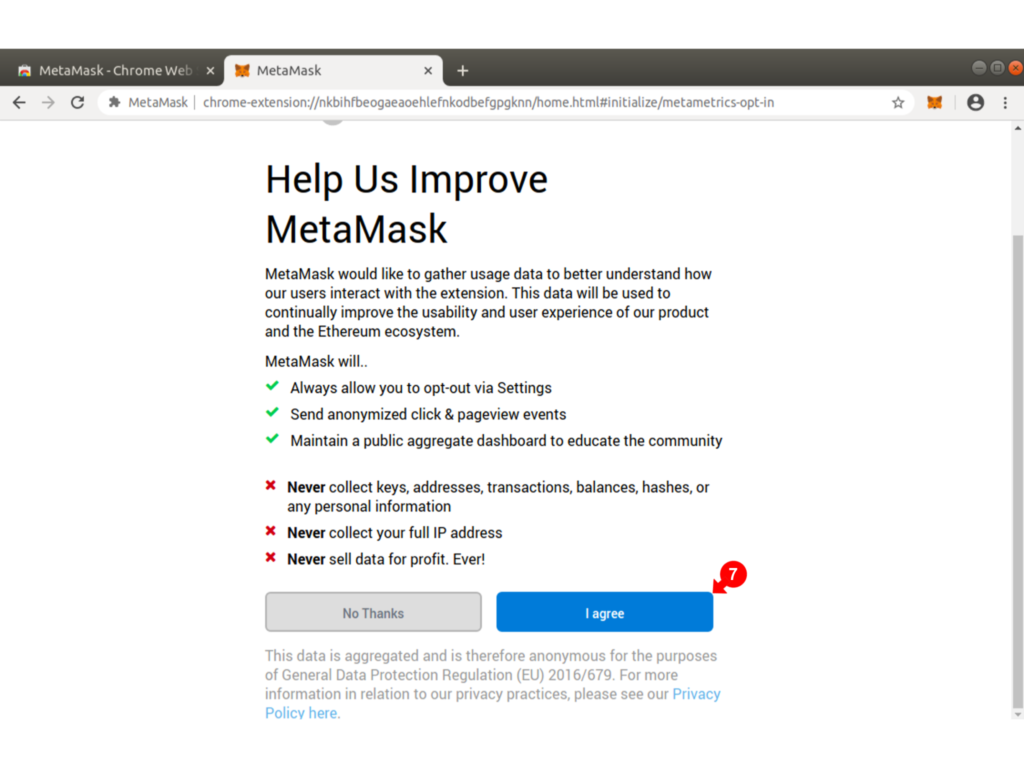
Click Agree (7) if you wish to help Metamask by submitting usage feedback information.
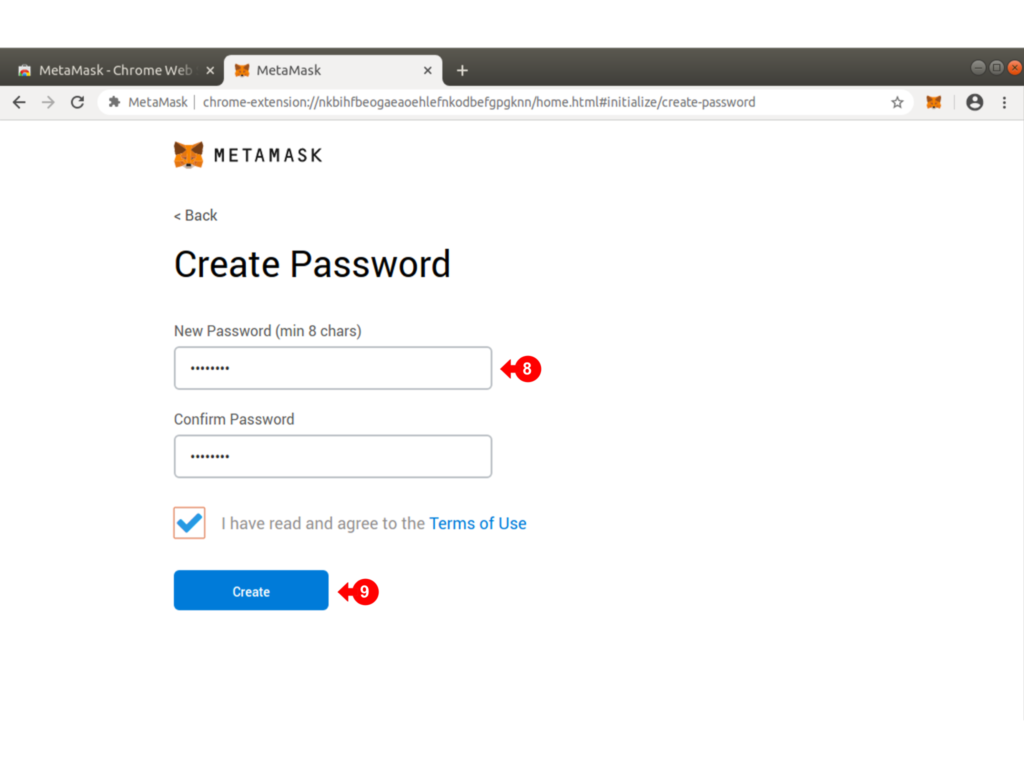
Next enter a Metamask password (8). This is a password which will enable you to open the wallet. Click create (9) when ready
The wallet is then created and next you will be given an option to record the secret backup phrase (10). This is very important in the live environment where real ETH is being used. The secret backup phrase (a series of seed words) will enable you to restore the wallet on another device.
If this is your first wallet, follow through on obtaining and recording the secret backup phrase for practice. Otherwise click (11) to continue and back up later.

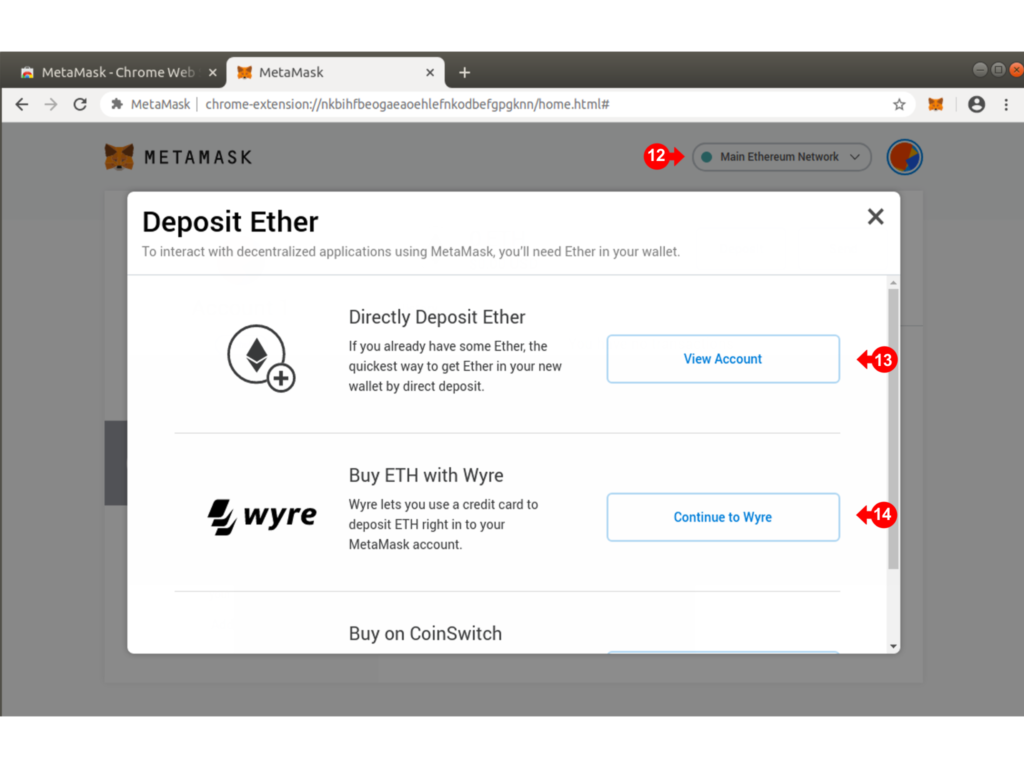
Note on the next screen which Network you are connected to (12). Be extra careful if you are on the Main Ethereum Network as real funds will be in use.
You may view (13) the active account details (address, qr code for receiving and sending)
You may alos fund (14) the active account. Again, be careful as real eth and real funds are in use if you are on the Main Ethereum Network
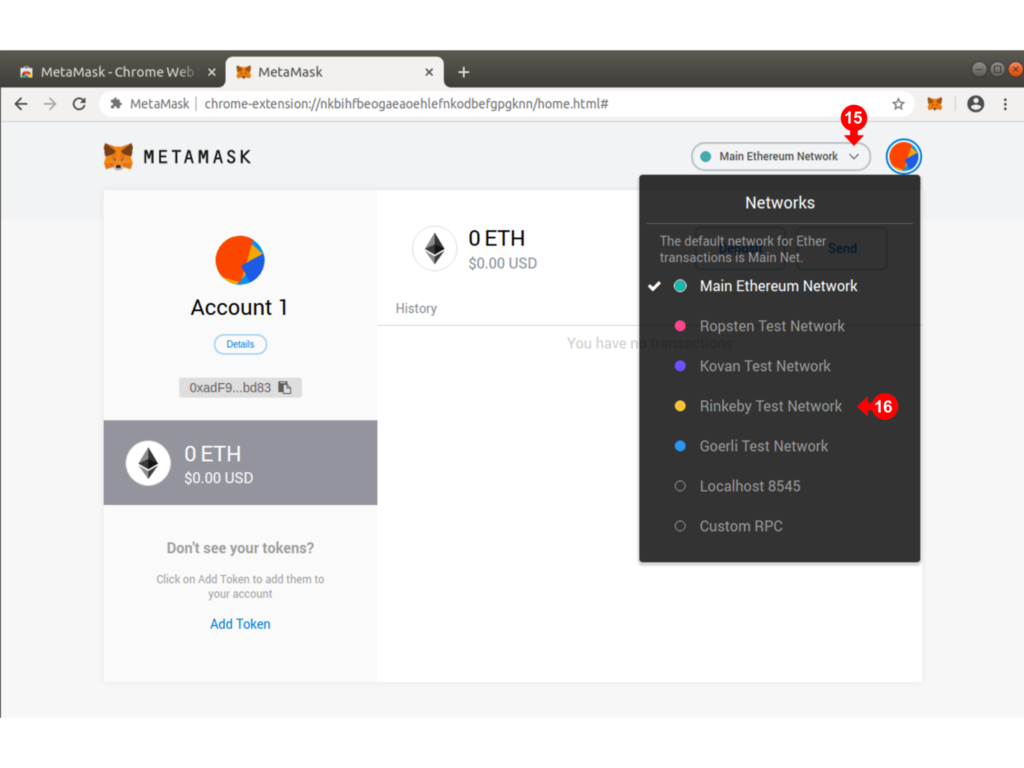
To select a test network click on the drop down arrow (15) and select the Rinkeby Test Network (16)
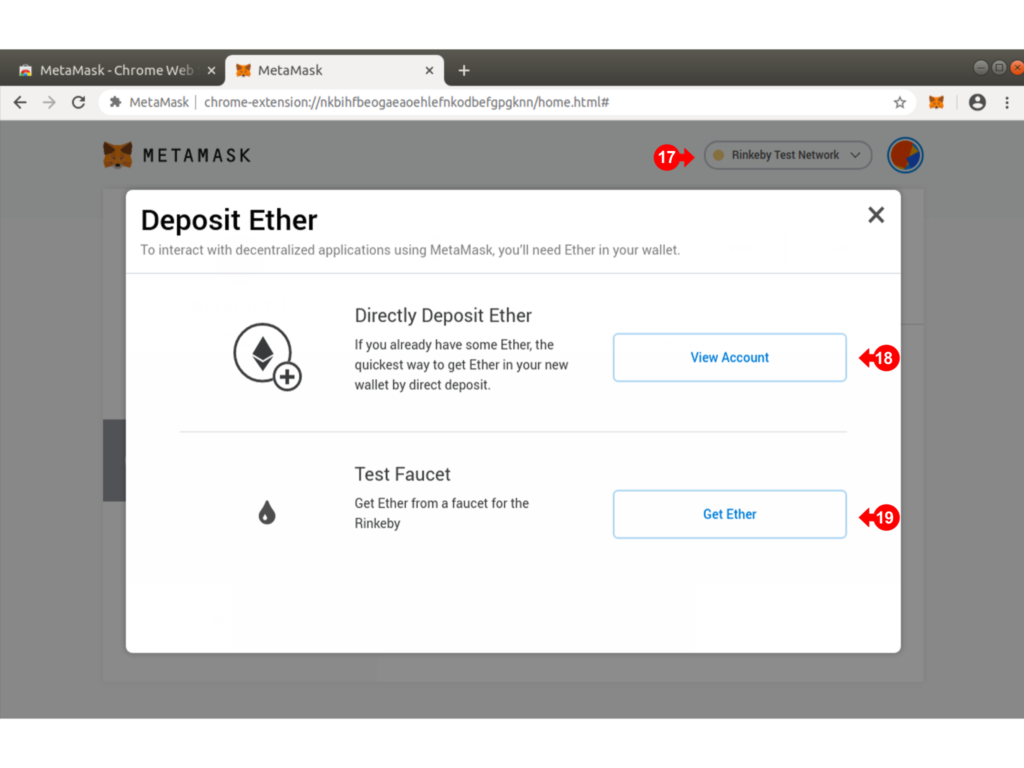
Check that the selected network is Rinkeby (17), the Test Network.
As with the Main Ethereum Network, you may view the account (18)
You may also get some freen Rinkeby Ethereum tokens for testing by clicking (19). Note that these will not have any real valus and will be used purely for testing.
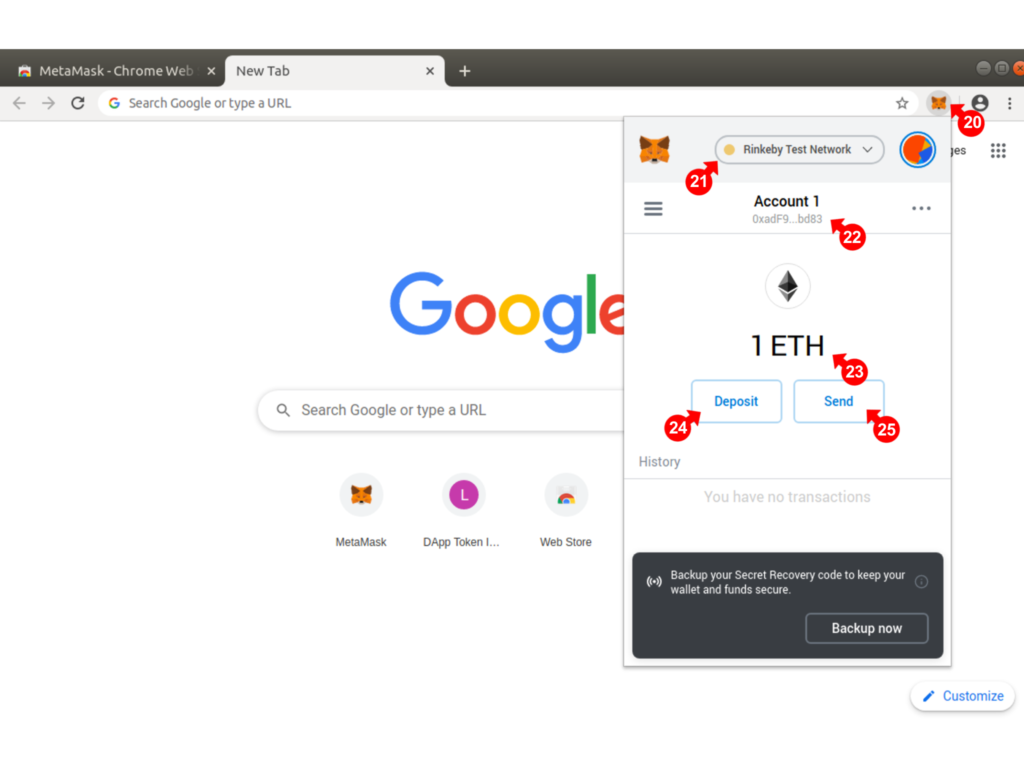
At this point you have installed a working Metamask Wallet. Note that when you click the “fox” (20), the pop up wallet appears.
Check the Network (21), the Account name and address (22), the ETH balance (23).
To receive ETH, click (24), and a QR code appears which a sender can use to send you ETH
To send ETH, click (25), you will need to paste in the recipient’s address or scan the recipient’s QR Code